
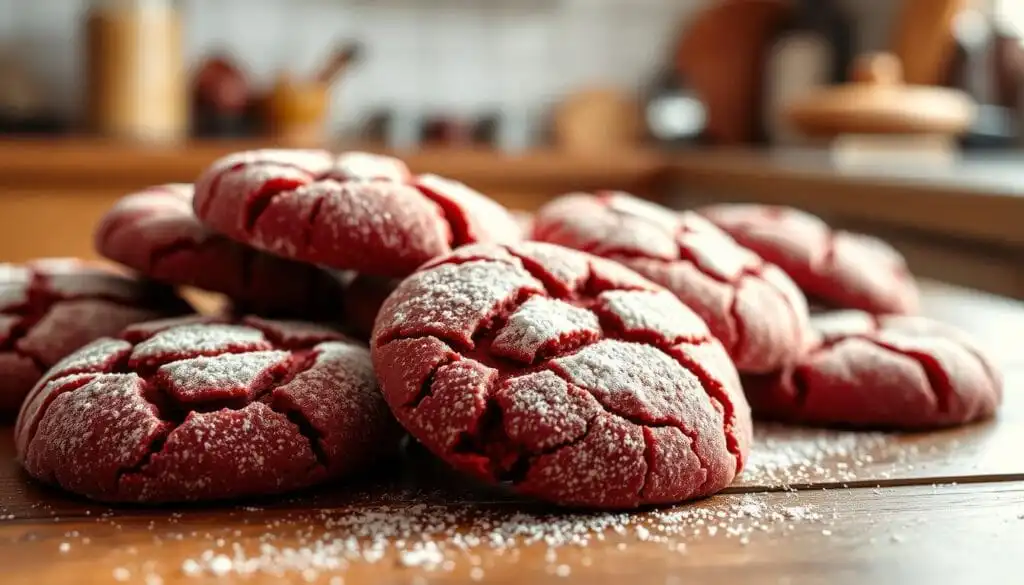
As the sun sets, the kitchen fills with the scent of cookies. It brings back memories of family moments around the counter. We all wait for the first bite of these red velvet treats.
The cookies’ rich, fudgy texture and sweet flavor are a tradition for us. Baking these cookies is a labor of love. They mix classic comfort with a modern twist, making every bite special. red velvet cookie recipe.
Key Takeaways
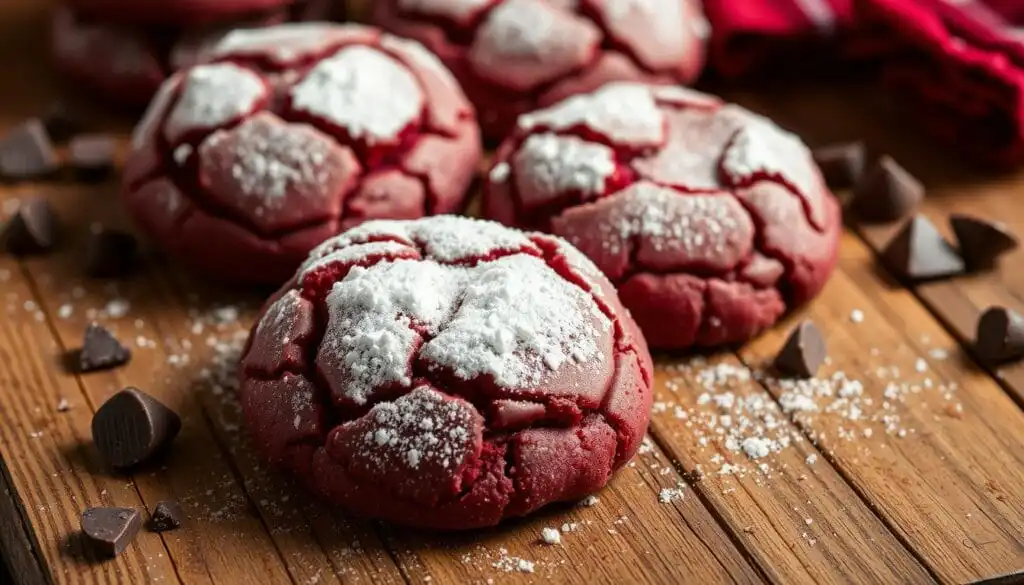
- Soft, chewy, and fudgy red velvet cookies that melt in your mouth
- Easy to make with no chilling required, perfect for any occasion
- Combines brown and granulated sugar, melted butter, cocoa powder, and red gel food coloring
- Stays fresh for up to 4 days at room temperature or 3 months in the freezer
- Yields 10-12 large cookies with a classic red velvet flavor and appearance
Understanding the Magic of Red Velvet Cookies
Red velvet cookies have a unique flavor that stands out. They mix cocoa and vanilla for a mild chocolate taste. The bright red color makes them festive and eye-catching.
These cookies are not just about looks. They are soft and melt in your mouth. Adding cream cheese makes them even more decadent.
The Perfect Balance of Cocoa and Vanilla
The flavor of red velvet cookies comes from cocoa and vanilla. Cocoa gives a gentle chocolate taste. Vanilla adds a sweet and familiar note.
This mix makes red velvet cookies special. They taste unlike any other cookie.
Why These Cookies Are Special
- Vibrant red color that adds a festive and eye-catching appeal
- Soft, melt-in-your-mouth texture that melts on the tongue
- Versatile for various occasions, from Valentine’s Day to Christmas
- Customizable with different toppings, mix-ins, and cream cheese for an extra decadent touch
Red velvet cookies are special because of their flavor and versatility. They’re perfect for any occasion. Baking them is sure to impress and delight.Essential Ingredients for Perfect Red Velvet Cookies
To make the perfect red velvet cookies, you need the right ingredients. You’ll need classic cocoa powder and vibrant red food coloring. Each ingredient is key to getting that iconic red velvet taste and texture.
All-purpose flour is the base of these cookies. It gives them structure. Brown sugar and granulated sugar balance the sweetness. Unsalted butter adds richness and a crisp edge.
The cocoa powder is the star. Choose Dutch-process or Hershey’s Special Dark for the best flavor. These types of cocoa powder give a deeper, richer chocolate taste. Remember, a room temperature egg is needed to bind the dough.
- All-purpose flour
- Brown sugar
- Granulated sugar
- Unsalted butter
- Dutch-process or Hershey’s Special Dark cocoa powder
- Room temperature egg
- Red gel food coloring
- Vanilla extract
Red gel food coloring is key for the vibrant red color. Liquid food coloring can thin the dough and change the texture. Vanilla extract adds a comforting aroma and subtle sweetness.
For an authentic red velvet taste, add cream cheese to the dough. It adds a tangy, rich element that complements the cocoa and red velvet flavors.
With these ingredients, you’re ready to bake irresistible red velvet cookies. They will surely delight your taste buds.
Kitchen Tools and Equipment You’ll Need
To bake delicious red velvet cookies, you need more than a bowl and spoon. You’ll need some key baking tools and equipment. This ensures your cookies are perfect every time. Let’s look at the must-haves and some optional tools that make baking easier.
Must-Have Baking Tools
- A medium-sized mixing bowl for combining the ingredients
- A whisk for thoroughly mixing the wet and dry ingredients
- A large spatula or wooden spoon for scraping and folding the dough
- Baking sheets or pans lined with parchment paper for even heat distribution
- A cookie scoop or spoon to portion the dough into uniform shapes
Optional but Helpful Equipment
These extra items can make baking more efficient and fun:
- A stand mixer with a paddle attachment for easy mixing and kneading of the dough
- A digital kitchen scale for precise flour measurement, which is crucial for consistently soft and chewy cookies
- A cooling rack to allow your freshly baked cookies to cool completely before decorating or serving
- Plastic bags and a fine mesh strainer for making your own colored sugar to sprinkle on top of the cookies
With the right baking tools for cookies and cookie baking equipment, you’re ready to make perfect red velvet cookies. Now, let’s get to the recipe steps!
Red Velvet Cookie Recipe: Step-by-Step Instructions
Making the perfect how to make red velvet cookies begins with a special recipe. Follow these easy steps to make a batch of red velvet cookie baking instructions that are simply irresistible.
- Preheat your oven to 350°F (177°C) and line a baking sheet with parchment paper.
- In a medium bowl, cream together the 1/2 cup (113g) unsalted butter, 1/2 cup (100g) granulated sugar, and 1/2 cup (104g) light brown sugar until light and fluffy.
- Beat in the 1 large egg and 2 tsp (10ml) red velvet baking emulsion until well combined.
- In a separate bowl, whisk together the 1 3/4 cups (210g) all-purpose flour, 1/2 tsp (3g) baking soda, 1/2 tsp (3g) salt, and 1/4 cup (30g) unsweetened cocoa powder.
- Gradually add the dry ingredients to the wet ingredients, mixing just until combined. Fold in the 1/2 cup (80g) white chocolate chips.
- Scoop the mixture into 24 equal-sized balls and roll them in granulated sugar.
- Place the mixture balls onto the arranged preparing sheet, dispersed almost 2 inches apart.
- Bake for 10-12 minutes, or until the edges are set and the centers are still marginally soft.
- Allow the treats to cool on the preparing sheet for 5 minutes some time recently exchanging them to a wire rack to cool completely.
Enjoy these how to make red velvet cookies with their crisp edges and soft, fudgy centers. The white chocolate chips add a delightful contrast to the bold red velvet cookie baking instructions.
“These red velvet cookies are a true delight! The perfect balance of cocoa and vanilla, with a vibrant red color that’s sure to impress.”
Mastering the Perfect Cookie Texture
Getting the perfect texture is key for soft red velvet cookies and chewy red velvet cookies. The secret is finding the right mix of soft centers and crispy edges. With a few simple tips, you can bake cookies that are irresistible and melt in your mouth.
Tips for Achieving Soft Centers
To get soft red velvet cookies with a melt-in-your-mouth center, don’t overbake them. Take them out of the oven when the edges are set but the centers are still a bit puffy. As they cool, they’ll deflate and become soft and chewy all over.
Creating Crispy Edges
For the perfect mix of soft centers and crispy edges, chill the melted butter before mixing it into the dough. This trick helps make chewy red velvet cookies with a nice crunch around the edges. Bake them at 350°F (175°C) for 10-12 minutes. This ensures the edges are crispy while the middles stay soft and gooey.
“The key to perfecting the texture of red velvet cookies is all about timing and temperature. Undercooked and they’ll be too soft, overcooked and they’ll lose their signature chewiness.”
By following these simple tips, you’ll always bake soft red velvet cookies and chewy red velvet cookies that impress everyone. Enjoy the perfect mix of soft centers and crispy edges in every bite!
The Secret to Vibrant Red Color
Getting that deep red color in your red velvet cookies is key. The secret is red gel food coloring. It’s more concentrated than liquid coloring, so you use less and get a bold red.
For red velvet cookies, choose red gel food coloring over liquid. The gel won’t change your dough’s texture. You can adjust the gel to get the red shade you want.
Natural options like beet powder can add a reddish color. But they might not be as vibrant as gel coloring. Cocoa powder in the recipe also adds to the color. Use high-quality unsweetened cocoa for the best look.
| Ingredient | Quantity |
|---|---|
| All-Purpose Flour | 1 ¾ cups |
| Unsweetened Cocoa Powder | ¼ cup |
| Red Gel Food Coloring | ¾ teaspoon |
Red gel food coloring and cocoa powder make vibrant, mouth-watering red velvet cookies. They’ll impress your friends and family.
Decorating and Presentation Tips
Make your homemade red velvet cookies shine with these decorating tips. Try vibrant sugar coatings or creative touches. There are many ways to make your red velvet cookie decorations pop.
Sugar Coating Options
Roll your red velvet cookies in sugar coating for a festive look. Use red sanding sugar for a classic vibe. Or mix granulated sugar with gel food coloring for custom colors.
After baking, add more sugar for a sparkly finish. This makes your cookies even more special.
Adding Special Touches
Top your cooled red velvet cookies with cream cheese frosting for a decadent treat. This classic combo enhances the cookies’ rich flavor. Or turn them into sandwiches with frosting in between.
Press white chocolate chips into the dough for extra sweetness. They melt into pockets of flavor in each cookie.
Storage and Freshness Guidelines
Storing your red velvet cookies right is key to keeping them fresh and tasty. Here are some easy tips to keep your cookies perfect:
- Put cookies in an airtight container at room temperature for 4-5 days. This keeps them soft and delicious.
- Freeze cookies for up to 3 months. Wrap them in plastic wrap, then in a freezer-safe bag to avoid freezer burn.
- To thaw frozen cookies, leave them at room temperature or warm them in a 300°F oven for a few minutes.
- If your cookies have cream cheese frosting, store them in the fridge. This keeps the frosting firm and prevents it from melting.
By using these cookie freshness tips, your homemade red velvet treats will stay fresh and tasty. Proper how to store red velvet cookies methods ensure you enjoy their amazing flavor and texture for longer.
Troubleshooting Common Baking Issues
Baking homemade red velvet cookies can be a fun experience. But, even experienced bakers might run into problems. Don’t worry, we have solutions for common issues you might face.
Fixing Cookie Spread Problems
Too much spreading in your cookies? It’s probably because your butter is too warm. Make sure to chill the melted butter before mixing it into the dough. This keeps the cookies from spreading too much.
Also, try using less sugar in your recipe. Too much sugar can make cookies spread more.
Addressing Color and Texture Concerns
Getting the right red color in your cookies can be hard. Use gel-based food coloring for a deep, rich red. It helps control the color without affecting the cookie’s texture.
If your cookies are dry or crumbly, they might have been baked too long. Watch the oven closely. Take them out when the edges are set but the centers are still soft.
FAQ
What makes red velvet cookies unique?
Red velvet cookies have a special taste, blending chocolate and vanilla. Their bright red color, soft texture, and cream cheese addition make them stand out.
What are the key ingredients in red velvet cookies?
Key ingredients are flour, sugars, butter, cocoa powder, egg, red gel coloring, and vanilla. Adding cream cheese gives them a richer taste.
What tools and equipment are needed to make red velvet cookies?
You’ll need a bowl, whisk, spatula, baking sheets, parchment paper, and a scoop. A digital scale is best for flour. A mixer and cooling rack are optional.
How do you achieve the perfect red velvet cookie texture?
For the right texture, don’t overbake. Take them out when edges are set but centers are still soft. They’ll cool to a chewy center with crispy edges. Chilled melted butter helps with chewiness.
What gives red velvet cookies their vibrant color?
Red gel food coloring gives them their bright color. Use gel for a strong color without affecting dough. Adjust the amount for the perfect shade. Cocoa powder also adds to the color.
How can you decorate and present red velvet cookies?
Roll cookies in red sugar before baking for a festive look. Make colored sugar with sugar and gel coloring. After baking, add more sugar. Top with cream cheese frosting or white chocolate chips for a classic touch.
How do you store and preserve red velvet cookies?
Store cookies in an airtight container at room temperature for 4-5 days. Freeze for up to 3 months. Wrap in plastic wrap and bag for freezing. Thaw at room temperature or warm in a 300°F oven. Refrigerate if using cream cheese frosting.
How can you troubleshoot common red velvet cookie baking issues?
If cookies spread too much, chill butter well. For color issues, use gel coloring and adjust as needed. If cookies are dry, they’re overbaked. For gluten-free, use a 1:1 blend with xanthan gum. Adjust for high altitudes.